Sunday, February 1, 2015

Inspiration

Earlier in the day, I'm sitting at my craft table looking at some of the projects that I've completed and at the pile of projects that are started. As I'm flipping through unused mini photo albums, I wondered what was it that made me want to make this project. Some items were inspired by fabulous crafters who have videos on YouTube, others were made with the intention to give as gifts or to sell on Etsy, and many were made because I wanted to learn a technique more than make an item that I would actually use.

Today, I want to share a Birthday calendar that I made a few months ago. The inspiration for this project came from my mother-in-law! When Pat and I were dating and we visited his mother, I would often see her look at a long, thin, worn calendar on the wall and hear her comment about who had a birthday or anniversary this month. What a great way to remember all those dates and not have to copy them every year to a new calendar! Of course, my name was not listed on the February page because I was not technically family.

I will never forget the day that Pat told his mom that we were getting married. She went right over to the calendar and asked me what was the date of my birthday. At that moment, I truly felt that she was giving us her blessing! Soon after, I decided to make my own Birthday/Anniversary calendar.

The paper collection that I chose was A Place in Time by Graphic 45. I love all of their papers and have been referred to as a Graphic 45 paper hoarder!

 The first 6 months of the year are on one side of the tags and the 
                                                   last 6 months are on the reverse side.


          The November paper was adhered to a tag using Ranger Ink Matte
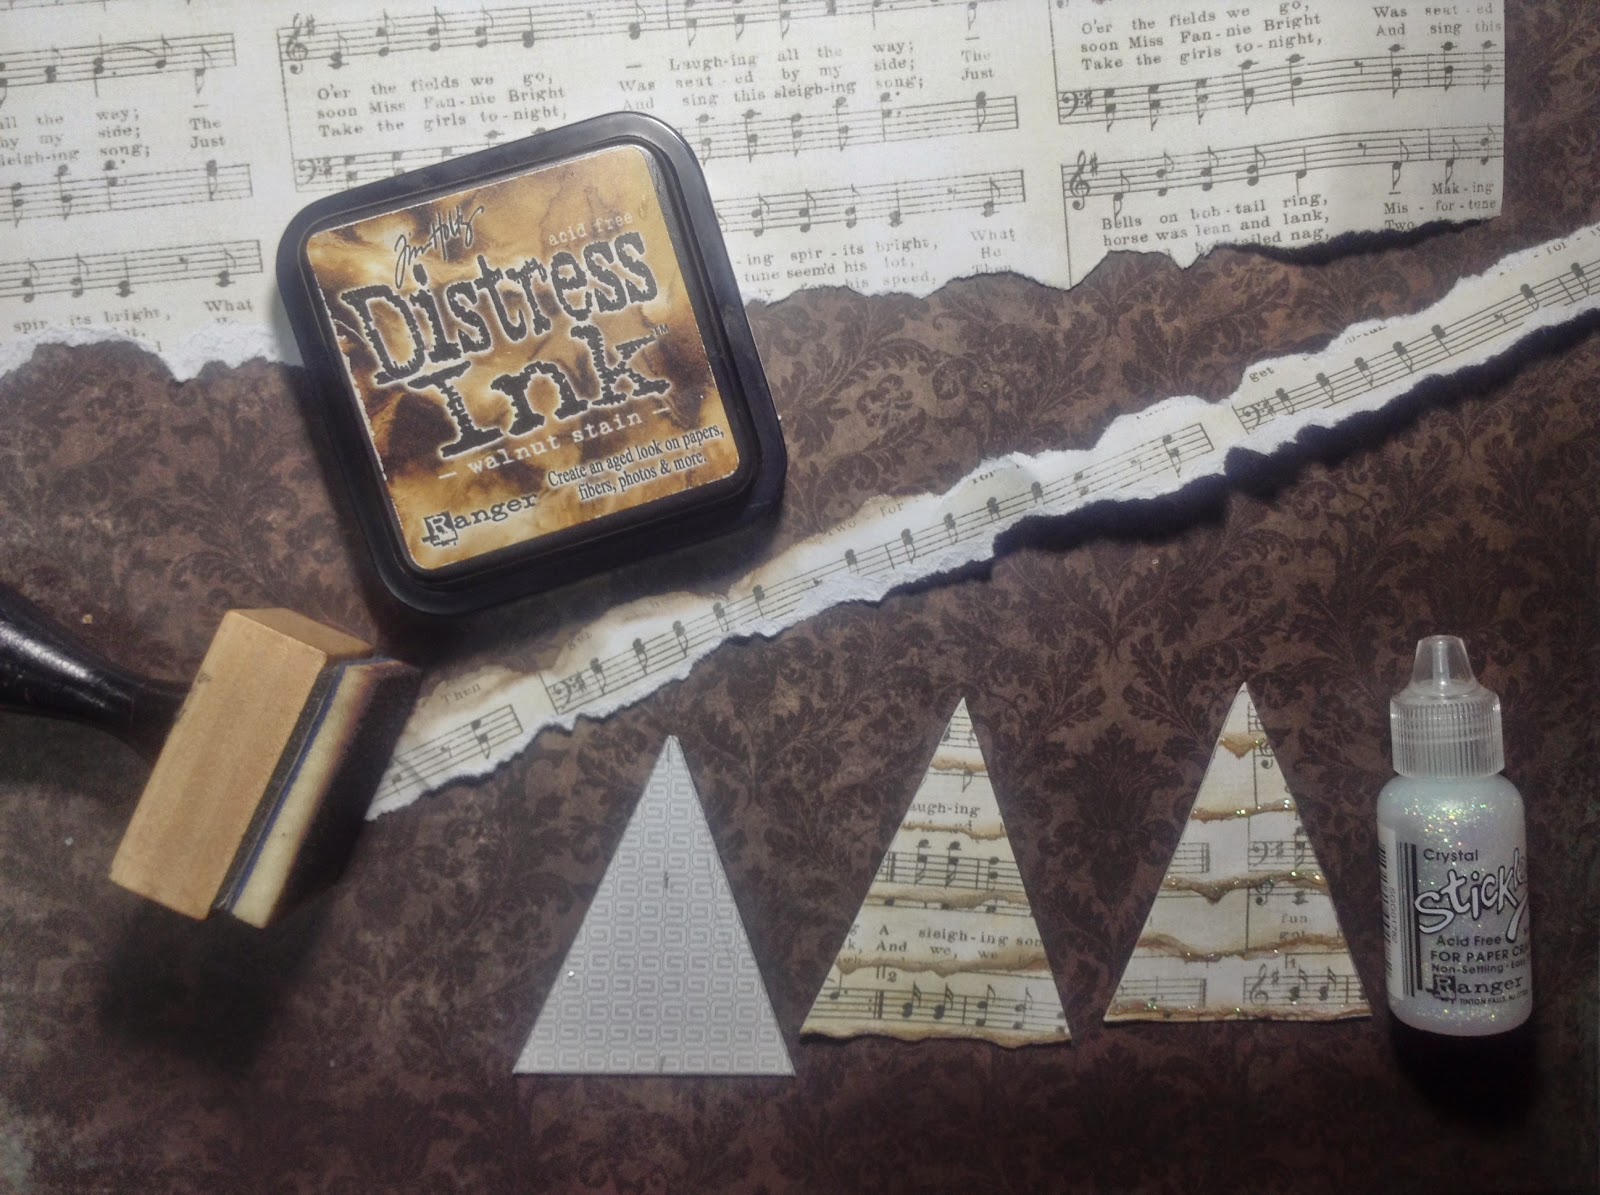
      Multi-Medium by Claudine Hellmuth. I also colored
      all the edges of the paper with Tim Holtz Distress Inks.


    I assembled all the bits and pieces of paper to make tags and
         a little booklet where I will list all the birthdays and anniversaries for 
     that month. Ranger glossy accents is my choice of wet glue because
     it dries quickly, has a strong hold, and is not sticky when dry.


   Here are the completed tag fronts for January, February, and March.


 So, what inspires you?

Sunday, November 30, 2014

Peace on Earth - Holiday Tag Swap

Mini Album Swaps on Facebook posted a tag swap and I decided to join. The challenge was to send 5 tags that included either circles or triangles to my partner. Sounds easy enough since ornaments are generally round and trees are triangular. So why did I stress over it! Well, my partner and I decided that we would go for a more vintage theme. I made two samples that included trees but to me the triangle shape was making my tags look too modern. They didn't even pass for 50's vintage style! Of course thanks to procrastination and a deadline I finally came up with a design that appealed to me. I hope my partner, Theresa, feels the same!

First, I decided to make my trees with paper that looked like old sheet music.
Distressing the edges with Walnut Stain added to the vintage look.

Then, I needed a tag base. I used wooden tags so they could also be used as an ornament.
I used Miracle Tape because wet glue would cause the wood to warp.

Of course, there should be snow under the tree! 
This glitter reminds me of the snow on the vintage cardboard houses.

Deciding on a message was easy. Pat and I always say we 
want Peace for our Christmas gifts.


I added some holly from my supply stash. Perfect!
Using the Distress Ink on the edges of the leaves added dimension.

The finished tag! Happy Holidays!

Wednesday, July 2, 2014

Gardens

While walking in the yard, I realized that no matter where I lived, I have always had a garden. My gardens have ranged from plants on a window sill to a 3/4 acre plot with several flower beds. My best garden was a vegetable garden I had a few years back that gave us tomatoes, peppers, cucumbers, and squash all summer long. My worst was when I attempted to plant a couple flower pots for my city yard. I couldn't understand why the plants kept dying until I realized that what I though were pebbles to put at the bottom of the pot for drainage were actually pebbles of rock salt!

This year, I am grateful to have several flower gardens. My favorite is the little bed just outside my studio door.


My gardens are arranged with items and flowers that hopefully give the viewer an opportunity to experience a pleasant memory or emotion. This garden is rather whimsical!


Sunday, June 15, 2014

Let's Start at the Beginning!


Welcome to my blog! My name is Joanna and I will be sharing pictures, videos and tutorials of my crafts. At this time, I am addicted to all things paper such as mini photo albums, scrapbooking pages, cards and journals. 

This spring, I married my best friend Patrick. Of course, I created as many things as I could from paper for the wedding. Above is a picture of our wedding invitation. I will show you more items in future posts. 

For now, I want to welcome you to my new journey of marriage, crafting and blogging.